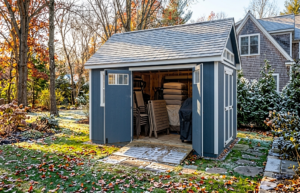

Installing a custom outdoor building is one of the best ways to expand your home’s storage space, but long-term structural integrity always depends on what lies beneath. Proper shed foundation setup is the single most critical phase of any installation project. Skimping on site preparation or placing a building directly on uneven turf creates severe structural risks over time, including stuck doors, water intrusion, wall warping, and premature wood decay.
Mastering outdoor shed base prep requires understanding how soil conditions, ground slope, and seasonal frost affect your structure. A well-constructed foundation elevates your shed off raw ground, creates a stable load-bearing platform for heavy machinery, and facilitates critical airflow beneath the floor joists. Taking the time for accurate leveling ground for shed placement prevents settling issues caused by freeze-thaw cycles, protecting your investment for decades.
Whether you plan to build a gravel pad, pour a concrete slab, or use concrete piers, starting with a clean, level footprint ensures seamless assembly and code compliance. For homeowners investing in high-quality sheds in massachusetts, executing a precise foundation setup provides total peace of mind—guaranteeing your workshop, garden studio, or storage hub remains level, dry, and structurally sound through every season.
Why Proper Shed Foundation Setup Matters for Long-Term Durability

A solid shed foundation setup is the single most critical step in ensuring the structural integrity, door alignment, and longevity of your outdoor building. Without proper ground clearance and structural support, moisture accumulation can quickly cause floor joists to rot, frame posts to warp, and walls to shift over time.
Unprepared soil holds groundwater that expands during winter freezing, causing unanchored or uneven bases to shift dramatically. A properly excavated, well-drained gravel or concrete base acts as a shock absorber against ground movement, protecting your building’s structural alignment year-round.
Executing accurate outdoor shed base prep prevents costly issues like stuck double doors, cracked siding, and uneven weight distribution caused by seasonal freeze-thaw cycles. Taking the time for accurate leveling ground for shed placement guarantees that your structure remains secure, well-drained, and capable of holding heavy lawn machinery.
Proper ground preparation raises the floor frame off raw soil, shielding timber from standing groundwater and frost heave. Choosing a level gravel pad or poured concrete base prevents premature settling and preserves your building’s structural warranty. When planning high-quality sheds in massachusetts, working with experienced local builders like Dino Sheds ensures your site layout complies with municipal setback codes and delivers a level, well-drained foundation engineered to withstand harsh New England weather for decades.
Choosing the Right Outdoor Shed Base Prep Option

Selecting the ideal outdoor shed base prep method depends on your building’s overall weight, your property’s soil composition, and your budget. Choosing the correct foundation strategy guarantees proper weight distribution and prevents seasonal ground shifting under heavy lawn equipment or multi-purpose workshops.
The three primary options for a successful shed foundation setup include:
Compacted Gravel Pad: A gravel pad framed with pressure-treated timber offers superior drainage, affordability, and flexibility. It is the most popular choice for standard storage buildings because it allows water to drain away freely while maintaining a perfectly level surface.
Poured Concrete Slab: A poured concrete pad provides maximum structural support and durability. This option is ideal for large multi-purpose workshops, heavy machinery storage, or sites with steep ground slope requiring a permanent, solid concrete footprint.
Concrete Block & Pier System: Utilizing concrete piers or deck blocks placed on compacted gravel offers an economical solution for smaller structures on minor slopes, raising the building off wet turf.
Evaluating your yard’s topography ensures you select appropriate sheds in massachusetts foundation parameters. Consult with local site prep specialists like Dino Sheds to determine which base design fits your specific property layout and usage goals.
Option 1: Compacted Gravel Pad (Grit and Crushed Stone)
A compacted gravel pad is widely considered the gold standard for residential outdoor shed base prep. Constructed by excavating raw topsoil and filling a timber-framed perimeter with crushed stone, this foundation style combines high structural load capacity with exceptional groundwater management.
Drainage & Freeze-Thaw AdvantageUnlike solid surfaces, crushed stone (such as 3/4-inch angular blue stone) allows water to percolate directly into the subsoil rather than pooling against wooden floor joists. This drainage mechanism prevents ice expansion underneath the structure during severe New England winters.
When executing a crushed stone shed foundation setup, incorporating heavy-duty geotextile fabric beneath the stone layer prevents weeds from sprouting and keeps aggregate from sinking into underlying mud. A well-compacted 4-to-6-inch gravel pad creates a dead-level, stable surface that extends the life of custom sheds in massachusetts while keeping build budgets manageable.
Option 2: Poured Concrete Slab
A poured concrete slab is the most permanent and heavy-duty choice for your shed foundation setup. By creating a continuous, monolithic concrete footprint directly on a gravel sub-base, this foundation type provides unmatched weight capacity, stability, and protection against settling over time.
Unlike wooden flooring systems that can flex under concentrated weight, a 4-inch reinforced concrete slab distributes extreme point loads evenly. This makes it the premier foundation choice if you plan to store heavy lawn tractors, zero-turn mowers, or heavy metalworking machinery.
Executing proper outdoor shed base prep for a concrete slab requires setting wooden forms, reinforcing the pour with steel rebar or wire mesh, and ensuring a slight slope at the apron to direct rainwater away from entry points. While it demands a higher initial investment and professional site work, choosing a poured concrete pad guarantees a lifetime of durability for high-capacity sheds in massachusetts, giving you a clean, level, and impenetrable surface built to endure all weather conditions.
Option 3: Concrete Block and Timber Frame Base
A concrete block and timber frame base offers an accessible, cost-effective method for simple outdoor shed base prep, particularly on yards with mild to moderate slopes. By elevating the building’s floor system on solid concrete deck blocks or cinder blocks anchored over a level gravel base, this option maximizes air circulation under your building while minimizing heavy excavation requirements.
Elevating the building frame creates an open crawl space that shields floor pressure-treated joists from constant soil contact. However, precise block spacing and level alignment are mandatory to prevent mid-floor sagging or framing stress under heavy storage loads.
Successful leveling ground for shed placement using concrete blocks involves excavating small pad areas beneath each block location and backfilling them with compacted crushed stone. This crucial step prevents individual blocks from sinking into raw dirt over time. For property owners building mid-sized sheds in massachusetts, a timber frame and block setup provides a practical solution that keeps your structure elevated, dry, and protected from surface water runoff.
Step-by-Step Guide to Leveling Ground for Shed Placement

Executing accurate leveling ground for shed placement is the foundation of a successful outdoor build. Skipping ground leveling creates structural tension, causes double doors to stick, and leads to floor sagging over time. Taking a structured, step-by-step approach ensures your site remains flat, stable, and completely well-drained.
The core process of outdoor shed base prep begins long before any timber or gravel touches your yard. It requires careful site selection, precise excavation, robust weed control, and systematic compaction to withstand seasonal weight shifts and soil movement.
Follow this step-by-step framework to execute a professional shed foundation setup:
Step 1: Choose the Site and Check Local Zoning Rules — Select high ground away from direct runoff and verify local setback requirements.
Step 2: Clear, Excavate, and Frame the Base Footprint — Remove topsoil, grass, and roots while establishing timber perimeter borders.
Step 3: Lay Geotextile Fabric and Fill with Crushed Stone — Install weed-barrier fabric and add angular crushed stone aggregate.
Step 4: Compact the Gravel and Verify Final Leveling — Use a mechanical plate compactor and long spirit level to guarantee a dead-level surface.
By following these four steps, homeowners installing sheds in massachusetts can build a solid foundation engineered for New England weather.
Step 1: Choose the Site and Check Local Zoning Rules
Before digging or ordering materials, choosing the ideal location on your property is the crucial first step of any shed foundation setup. Select a relatively flat area with good direct sunlight and natural drainage, avoiding low spots where rainwater gathers after heavy storms. Position your site to allow at least 3 to 5 feet of clear workspace around all sides, ensuring easy access for assembly, future wall maintenance, and lawn equipment maneuvering.
Equally critical is verifying local building codes and municipal setback regulations. Most towns enforce strict zoning laws regarding how close an accessory building can be placed to property lines, fences, septic tanks, and utility easements. Smaller structures often bypass full building permits, but setback compliance remains mandatory. Checking local guidelines early prevents costly relocations and ensures your site prep for high-quality sheds in massachusetts adheres to municipal rules from day one.
Step 2: Clear, Excavate, and Frame the Base Footprint
Once your site is selected, mark out a footprint that extends 12 inches beyond your planned shed dimensions on all sides. This extra border ensures edge stability, prevents gravel erosion, and provides adequate drainage around the perimeter. Drive wooden stakes at the corners and stretch string lines across the site, using the 3-4-5 triangle method to verify that your corners are perfectly square.
Next, execute the physical excavation for your outdoor shed base prep. Remove all topsoil, sod, roots, and organic matter to a depth of 4 to 6 inches, digging down to firm subsoil. Raw soil and sod decompose over time, leading to uneven settling if left underneath your structure.
After clearing the excavation area, construct a sturdy perimeter box using 4×4 or 6×6 pressure-treated timbers rated for ground contact. Fasten the corners using heavy-duty timber screws or rebar stakes driven into the ground. Check the perimeter frame with a long builder’s level and adjust high or low spots by removing subsoil or shimming beneath the frame. Establishing a square, level timber border guarantees that your subsequent aggregate layer stays contained and dead-level for the final shed foundation setup.
Step 3: Lay Geotextile Fabric and Fill with Crushed Stone
With your timber frame square and level, line the bottom and inner sides of the excavated site with a heavy-duty, woven geotextile fabric. This commercial-grade weed barrier serves two critical functions: it stops unwanted vegetation from growing up through your base and prevents the stone aggregate from sinking or churning into the soft mud subsoil over time.
Once the landscape fabric is secured in place, fill the perimeter frame with 3/4-inch crushed angular stone (often referred to as blue stone or crushed gravel). Avoid smooth, rounded river rock or pea gravel, as rounded stones shift under pressure and never pack down tightly.
Pour the stone in even 2-to-3-inch layers, spreading it evenly across the entire footprint using a heavy metal garden rake. Filling the bed in shallow stages ensures thorough aggregate distribution, setting the stage for proper drainage and structural compaction across your entire shed foundation setup.
Step 4: Compact the Gravel and Verify Final Leveling
The final phase of leveling ground for shed placement involves thorough compaction and precise surface verification. Loose aggregate will shift under the weight of a building, so solidifying the crushed stone layer is essential to create a rigid, load-bearing pad.
Use a heavy hand tamper for smaller bases, or rent a mechanical plate compactor for larger footprints. Work in a grid pattern, making multiple passes over the gravel pad until the 3/4-inch angular stone locks together into a dense, solid surface. As you compact, add stone to any low spots that appear and run the compactor over those areas again.
Once compaction is complete, place a long 8-foot spirit level or a laser level across the timber borders and the gravel bed in multiple directions (diagonally, horizontally, and vertically). The entire pad should be dead-level to within 1/4 inch across the full span. Completing this rigorous verification step guarantees a rock-solid, well-drained foundation for custom sheds in massachusetts, ensuring your doors swing freely and your building frame remains square for years to come.
Build Your Custom Shed with Dino Sheds

Planning a new outdoor building is an exciting home upgrade, but getting the foundation right requires local knowledge and experienced craftsmanship. At Dino Sheds, we understand how New England’s unique soil conditions, seasonal frost heaves, and heavy winter loads affect long-term structural integrity.
From precision ground leveling to custom framing, we handle every detail so you don’t have to worry about shifting foundations, sticking doors, or premature wear.
Whether you need guidance on site excavation, choosing between a compacted gravel pad or a poured concrete slab, or full custom construction, our team delivers built-to-last craftsmanship tailored to your yard’s layout and municipal zoning codes. We take the guesswork out of site preparation, ensuring your building stays level, dry, and secure for decades.
Frequently Asked Questions About Shed Foundation Setup
Why is a level shed foundation necessary?
A level foundation ensures structural stability, prevents framing stress, and keeps double doors aligned so they open and close smoothly. It also elevates your shed to prevent standing water from rotting the wooden floor joists over time.
What is the best base option for a backyard shed?
A compacted gravel pad framed with pressure-treated timbers is the most popular and versatile option. It offers excellent drainage, high load capacity, and protects against freeze-thaw cycles at a lower cost than concrete.
Do I need a concrete slab for my shed?
A poured concrete slab is recommended if you plan to store exceptionally heavy equipment (like zero-turn mowers or tractors), use the shed as a heavy-duty workshop, or if local building codes require a permanent foundation.
How deep should I excavate for a gravel shed pad?
Standard excavation requires digging down 4 to 6 inches to remove topsoil, grass, and roots until you reach firm subsoil. This space is then lined with geotextile fabric and filled with compacted 3/4-inch crushed stone.
Can I place my shed directly on grass or dirt?
No. Placing a shed directly on soil exposes raw timber to constant ground moisture, causing rapid wood rot, mold growth, and premature settling as the ground soft-spots under weight.
What type of gravel should be used for a shed base?
Use 3/4-inch angular crushed stone (such as crushed blue stone or dense-grade aggregate). Do not use rounded river rocks or pea gravel, as smooth stones shift under pressure and cannot be properly compacted.
Why is geotextile landscape fabric required under gravel?
Commercial geotextile fabric prevents weeds from growing up through the gravel bed and stops the heavy crushed stone from sinking into the soft subsoil beneath over time.
How far should the gravel base extend beyond the shed dimensions?
The gravel pad should extend at least 12 inches wider than the shed footprint on all sides. This extra margin prevents edge erosion, controls splash-back dirt, and improves overall groundwater drainage.
How do freeze-thaw cycles affect a shed foundation in Massachusetts?
During New England winters, groundwater in unmanaged soil freezes and expands, causing unanchored or un-drained bases to shift (frost heave). A properly drained gravel pad or concrete slab acts as a buffer against this ground movement.
How do I know if my site needs professional prep work?
If your yard has a steep slope, poor soil drainage, severe groundwater runoff, or if you are installing a large structure, working with local specialists like Dino Sheds ensures your site layout complies with municipal setback codes and delivers a level, well-drained foundation engineered for longevity.